CrashDeck
Someone over on /r/cyberdeck, someone suggested the idea of a “CrashDeck”: a deck made using only materials you already have on hand, in one hour or less. I’ve been thinking over a build for a few months now, spending too much time on the same parts of the thinking, over and over again, without really getting any farther. I think this framing might be exactly what I need to get a first rough draft out, see what it feels like, And figure out what might make sense for a build with a little bit more time.
I have also, unrelatedly, been increasingly missing having a proper Plan 9 machine I can use on the couch.
Oh, and this is also a good way to start clearing things off my desk, which has been a total wreck for months.
I dropped my kid off at camp this morning, and I don’t have anything super urgent today (although certainly things I really ought to be doing instead), so I’m going to set aside some time to do it.
Considerations and objectives for my build: - I have a couple extra Raspberry Pi that aren’t currently being used for anything; at least one 4 and three Zero of various vintage. - I also have some screens I had previously purchased from Waveshare and used in some experiments that are now sitting idle. - It will be running Plan 9. I have my local installation a little bit of a mess, so to keep things safe and avoid blowing through the hour, I’m going to download a fresh copy of the 9legacy Raspberry Pi image and load a few things on after. - The “rules” of the project say that everything should be attached and you should be able to pick it up with one hand. I have a couple options for pointing devices, but I am likely to give myself some leeway here with a wireless mouse. - I don’t have anything resembling a 3-D printer, but I do have a wide variety of cardboard and some wood intended for models and crafts. That’s going to be the body.
Thinking about it on the drive home, a couple of things occurred to me. - A friend of mine came by to help with a house project some time ago, brought her table saw, and has left it here since. I can’t decide of setting it up is going to take more time than I’ll save by doing the small number of cuts I have in mind by hand, but I think I’m going to give it a shot. - The same friend is borrowing one of our cars for a few weeks starting two days ago, and I realized the rechargeable power brick I was planning to use for this is in that car. I don’t think I have another that has two USB ports on it, I’m not sure I can power the display I really wanted to use from the pi directly, and I’m not even sure I have another that reliably has enough power just for the Pi. Power is always the trickiest part with these builds. - I do actually have the parts for a more “proper” power solution that I purchased for the “real” (and perpetually in the future) version of this build, but I have never used them and I’m skeptical that trying to figure out how to do so now is the best use of time for this hour. Maybe at the end if everything else goes well. - I also have a Pi Sugar for a pi 4 and another for a Zero. The one for the Zero seems to be working properly, but the one for the 4 isn’t. I would rather use the 4 for this. - Depending on how things are going on time, I might still try my preferred display, but I also have a backup option that should work (it’s just a little smaller). That one would actually save some time, as that screen is already attached to a Pi. - I have screwed up the firmware on the keyboard I would most like to use. I have two second choice options, but I don’t like using either as much. I’m reminding myself this is a quick draft.
Also I just realized I’m very low on glue for my hot glue gun, which is my main plan for holding the frame together. I think my partner might have some at the right size in her craft cabinet.
I have done no more prep than walking around my workspace and making a pile on the couch with some likely candidate parts. I notably have not found my clamps or saws from the shed or set up the table saw. I’m going to try to post some pictures and quick notes as I go, post them live, and edit this after.
Updates
:00
Go!
My first step, since my home Internet is often terrible, is the start downloading the Raspberry Pi Plan 9 image. In work. Now off to the shed to find clamps and saws. And see if my Dremel still works.
:07
Three of my four clamps are not where I thought they were, but while looking I realized there’s a set that sort of came with the house that I’ve never had an occasion to use which are actually going to be better for this project.
I’m already starting to suspect not allowing myself to pre-gather things is going to be a bigger problem than anticipated, especially with the tablesaw in the garage and most other tools in the shed, which is a little walk in the other direction.
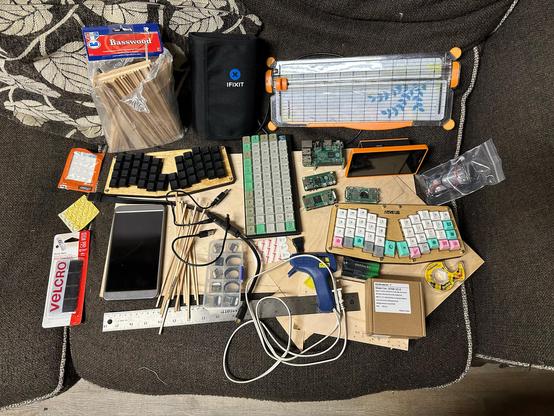
Here’s the initial pile of prospective parts, gathered from walking around my workspace (and largely cleaning up my desk).
:09
Oh, good, my partner has a whole pile of glue sticks that are the same size as mine. First crisis averted!
:14
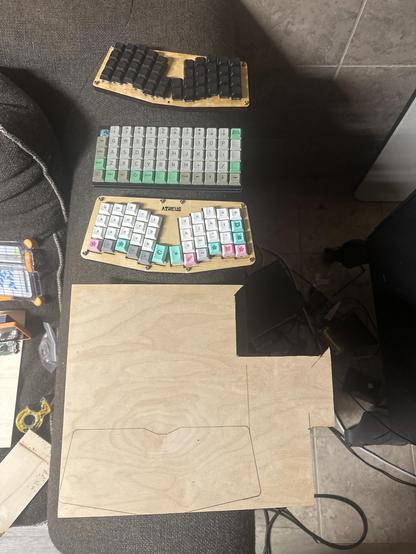
The most likely keyboards and the plate I’m hoping to mount them on. That 44-key Atreus is my favorite, but I’ve screwed up the firmware on it. I want to see if any of the screw holes on the two Atreus line up, so I can build with the other one for now and swap later.
:16
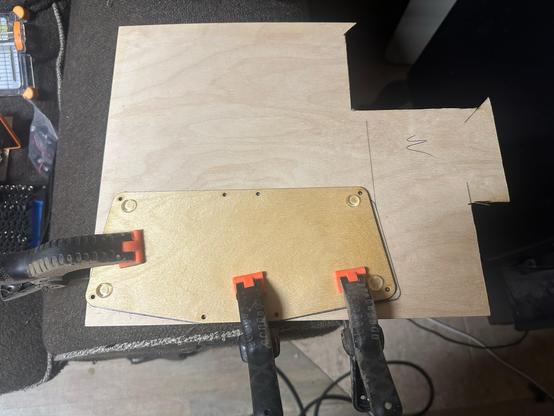
Arg, they don’t. The 42 key one is longer, so I knew that wouldn’t really line up, but I had hoped that the ones in front were the same position. They aren’t, and they are close enough that it would almost certainly screw up the baseboard.
:29
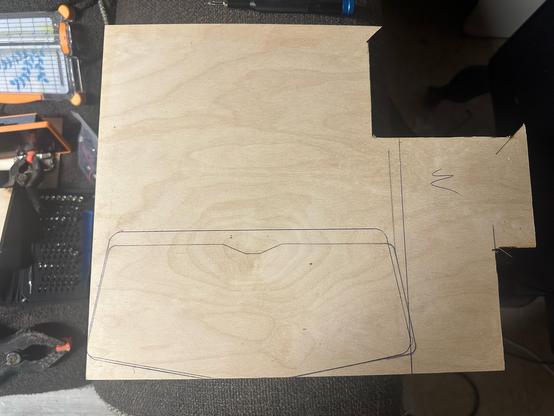
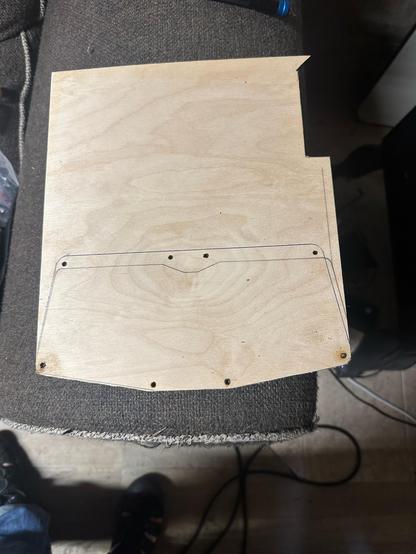
The existing bottom sheet traced out on the new plate, with a line running up the side. I was going to try to do it relative to the back of the rear edge of the Atreus, but I’m already behind on time (I really should’ve let myself gather the tools first).
:30
…especially since part of my hope for this was that I’d be able to hang out in the basement, which is currently the only room in the house with a tolerable temperature, instead running around outside looking for things. It’s very hot outside.
:44
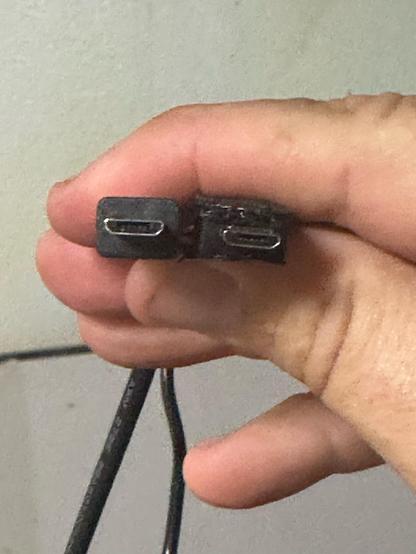
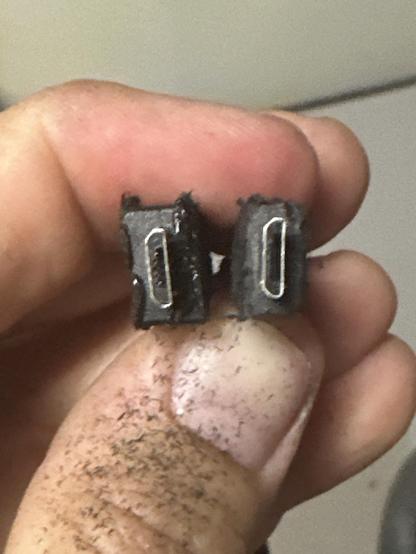
Baseboard finished. I need to replace the USB cable on the keyboard; it’s way too long. It also needs to be shaved down so that it fits inside the keyboard (like the existing one).
I’m feeling about 15 minutes behind where I wanted to be by now.
:46
There we go.
:53
An hour sure felt like a lot more time 45 minutes ago.
:60
Time. :-/
I figured it was a stretch but expected to be closer; this feels like about halfway.
(Also, I forgot how long my hot glue gun takes to warm up; I would’ve been finished with the baseboard and keyboard setup if I had plugged it in at the beginning.)
:87
Update: took a break for a few minutes and decided to keep going, at least until I’m out of time for what I need to get to next.
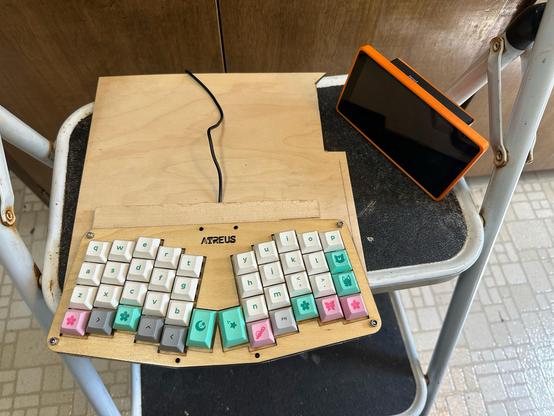
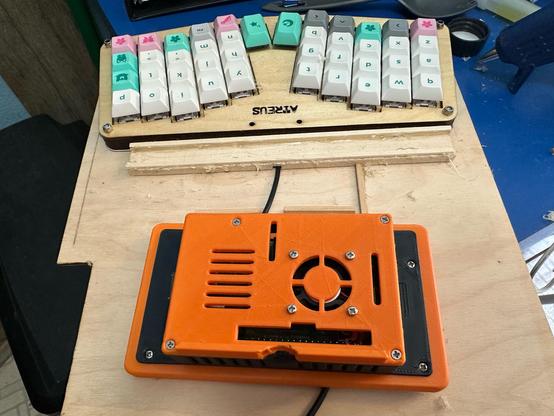
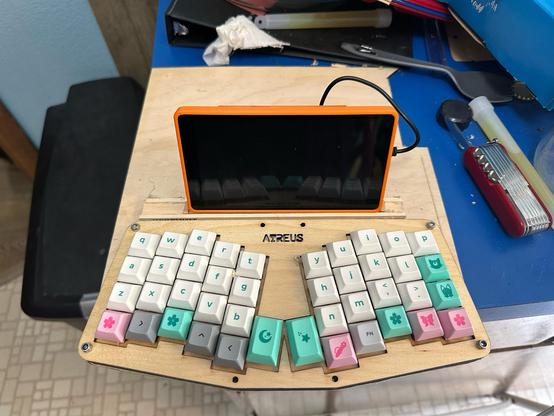
I figured out the framing for the pi and it’s display, except for one or more one or two more points to secure it. This is the part where I was least clear on the details, so I feel OK about how it turned out.
Trying to do this live was a mistake. It’s a good way to encourage taking more pictures and making better notes, but it just takes a lot of time.
:90
I’ve got to go get ready to pick up my kid from camp, so I’m calling it at 90 minutes. All that’s left for the hardware is cut off the back ~4 inches of the baseboard and turn it into a bracket to help hold the display in place, and then hope that my replacement USB power bank is strong enough to drive the pi (it should be with this display).
PostScript
Despite significantly missing my target, this was a very useful exercise.
I’ve been thinking about this design for a while now, but there were always a few parts that were hard to visualize.
The angle on the display is good for use on a desk/table, but too vertical for use on my lap on the couch, which is the main intended use. Getting to play with that helped me see that floating the screen slightly over the top edge of the keyboard both frees up some more space and clarifies the hight of the sides I’m likely to try (the sides were never going to be part of this build, but were always part of the the “real” (i.e. perpetually in the future) build).
I’d previously thought about making the overall shape follow the side lines on the Atreus, but had ruled that out because I thought it wouldn’t leave enough space. Having actually seen it, I think that’d work out really well, and it’s my plan for the next version of this.
More importantly, it got me out of my head a little and made me make something. That alone was worth it. It feels a lot easier to iterate now.
Oh, and it got some stuff off my desk.